Export
The Export module gets your data out of MyNetworkmap – as a CSV file for a spreadsheet, SPSS or R. Network files for Gephi, yEd and Visone are produced elsewhere – see the section What this module does not (any longer) offer.
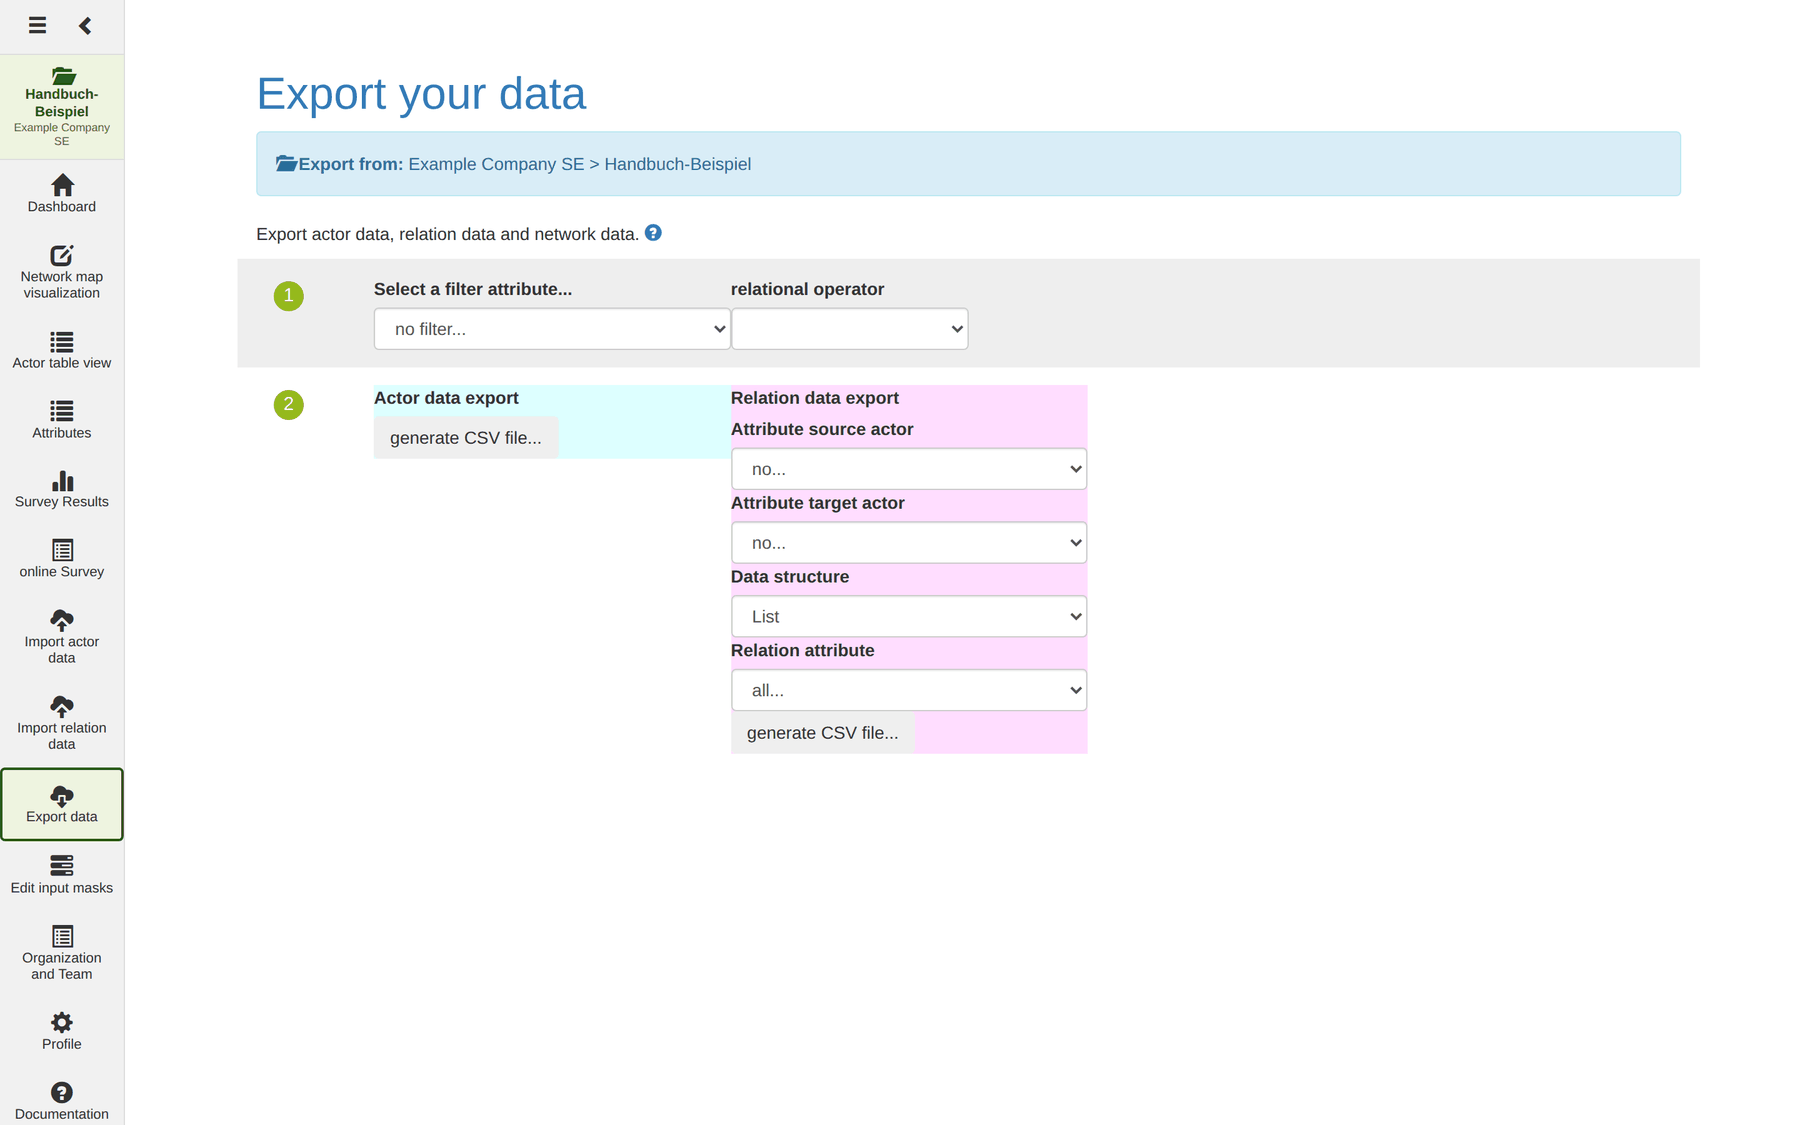
The page is divided into two numbered steps: first you narrow down which actors are exported, then you choose the format.
Caution: the export always comes from the active project. The blue note Export from: … at the top names it.
Note: exporting needs at least the role Editor – an export carries project data out of the system. Without the role you land back in the project list when opening the module.
Step 1: filtering actors
In the grey bar at the top you assemble a filter condition:
- Select an actor attribute… – no filter… exports every actor.
- Comparison operator – free-text attributes offer less, equal, not equal and greater, predefined attributes only equal and not equal.
- Value – a dropdown or an input field, depending on the attribute.
The filter applies to all export kinds in step 2.
Tip: if you need a more complicated selection, create a helper attribute in the actor table first –
Export group, say – and mark the actors with it.
Step 2: choosing a format
Exporting actor data
Create CSV file… produces a table with one row per actor and one column per attribute – including every computed measure.
This is the route to the centrality values. After Analysis → compute now on the network map,
inDegree_nwk_…,betweenness_nwk_…and the other measures are ordinary attribute columns in this file. Anybody needing a ranking, a scatter plot or a correlation fetches them here.Tip: the file also contains the actor IDs. You need exactly those if you edit data outside and want to feed it back through import.
Exporting relation data
A list of the relations, one row each. You set beforehand:
| Field | Meaning |
|---|---|
| Attribute of the first actor | Which attribute value names the source actor, usually Name |
| Attribute of the second actor | The same for the target actor |
| Data structure | List – one row per relation |
| Relation attribute | Which relation attribute is exported; all… takes them all |
Tip: choose an attribute with unique values for the naming. If names occur twice, the rows cannot be assigned unambiguously later – then the actor ID is the better choice.
This file doubles as the backup format for relations. It has exactly the structure the relation import expects and can therefore be transferred into another project.
What this module does not (any longer) offer
The page's introductory text also mentions network data. There are no buttons for it here, however: the module offers only the two CSV outputs above.
For the other formats you go elsewhere:
| Format | Where |
|---|---|
| GraphML (Gephi, yEd, Visone) | Network map → Export → graphml format |
| Image file (PNG) | Network map → Export → Export image |
| PDF report about a map | Network map → Export → As a report |
| Survey data as CSV or GraphML | Survey results → Download survey data |
Exporting the questionnaire links
After generating individual questionnaire links
(use case 1, step 10), each actor holds a link in the
attribute questionnaireLink_<questionnaire name>. An actor data export turns
that straight into the distribution list: one row per person with name, e-mail
address and personal link – ready for a mail merge.
File names and run time
The suggested file names carry the project name as a prefix, for instance
Klasse-7a_actorData.csv. That keeps exports from several projects apart.
Depending on the amount of data, an export takes seconds to minutes; the button shows a spinner meanwhile.
Tip: with large holdings, narrow things down with the filter first. That shortens the run time and makes the file clearer.
On data protection: an export leaves MyNetworkmap's rights system. What is in the file is there in plain text – names included. Consider before exporting whether you really need the name column, and treat the file as carefully as the survey itself.