Input masks
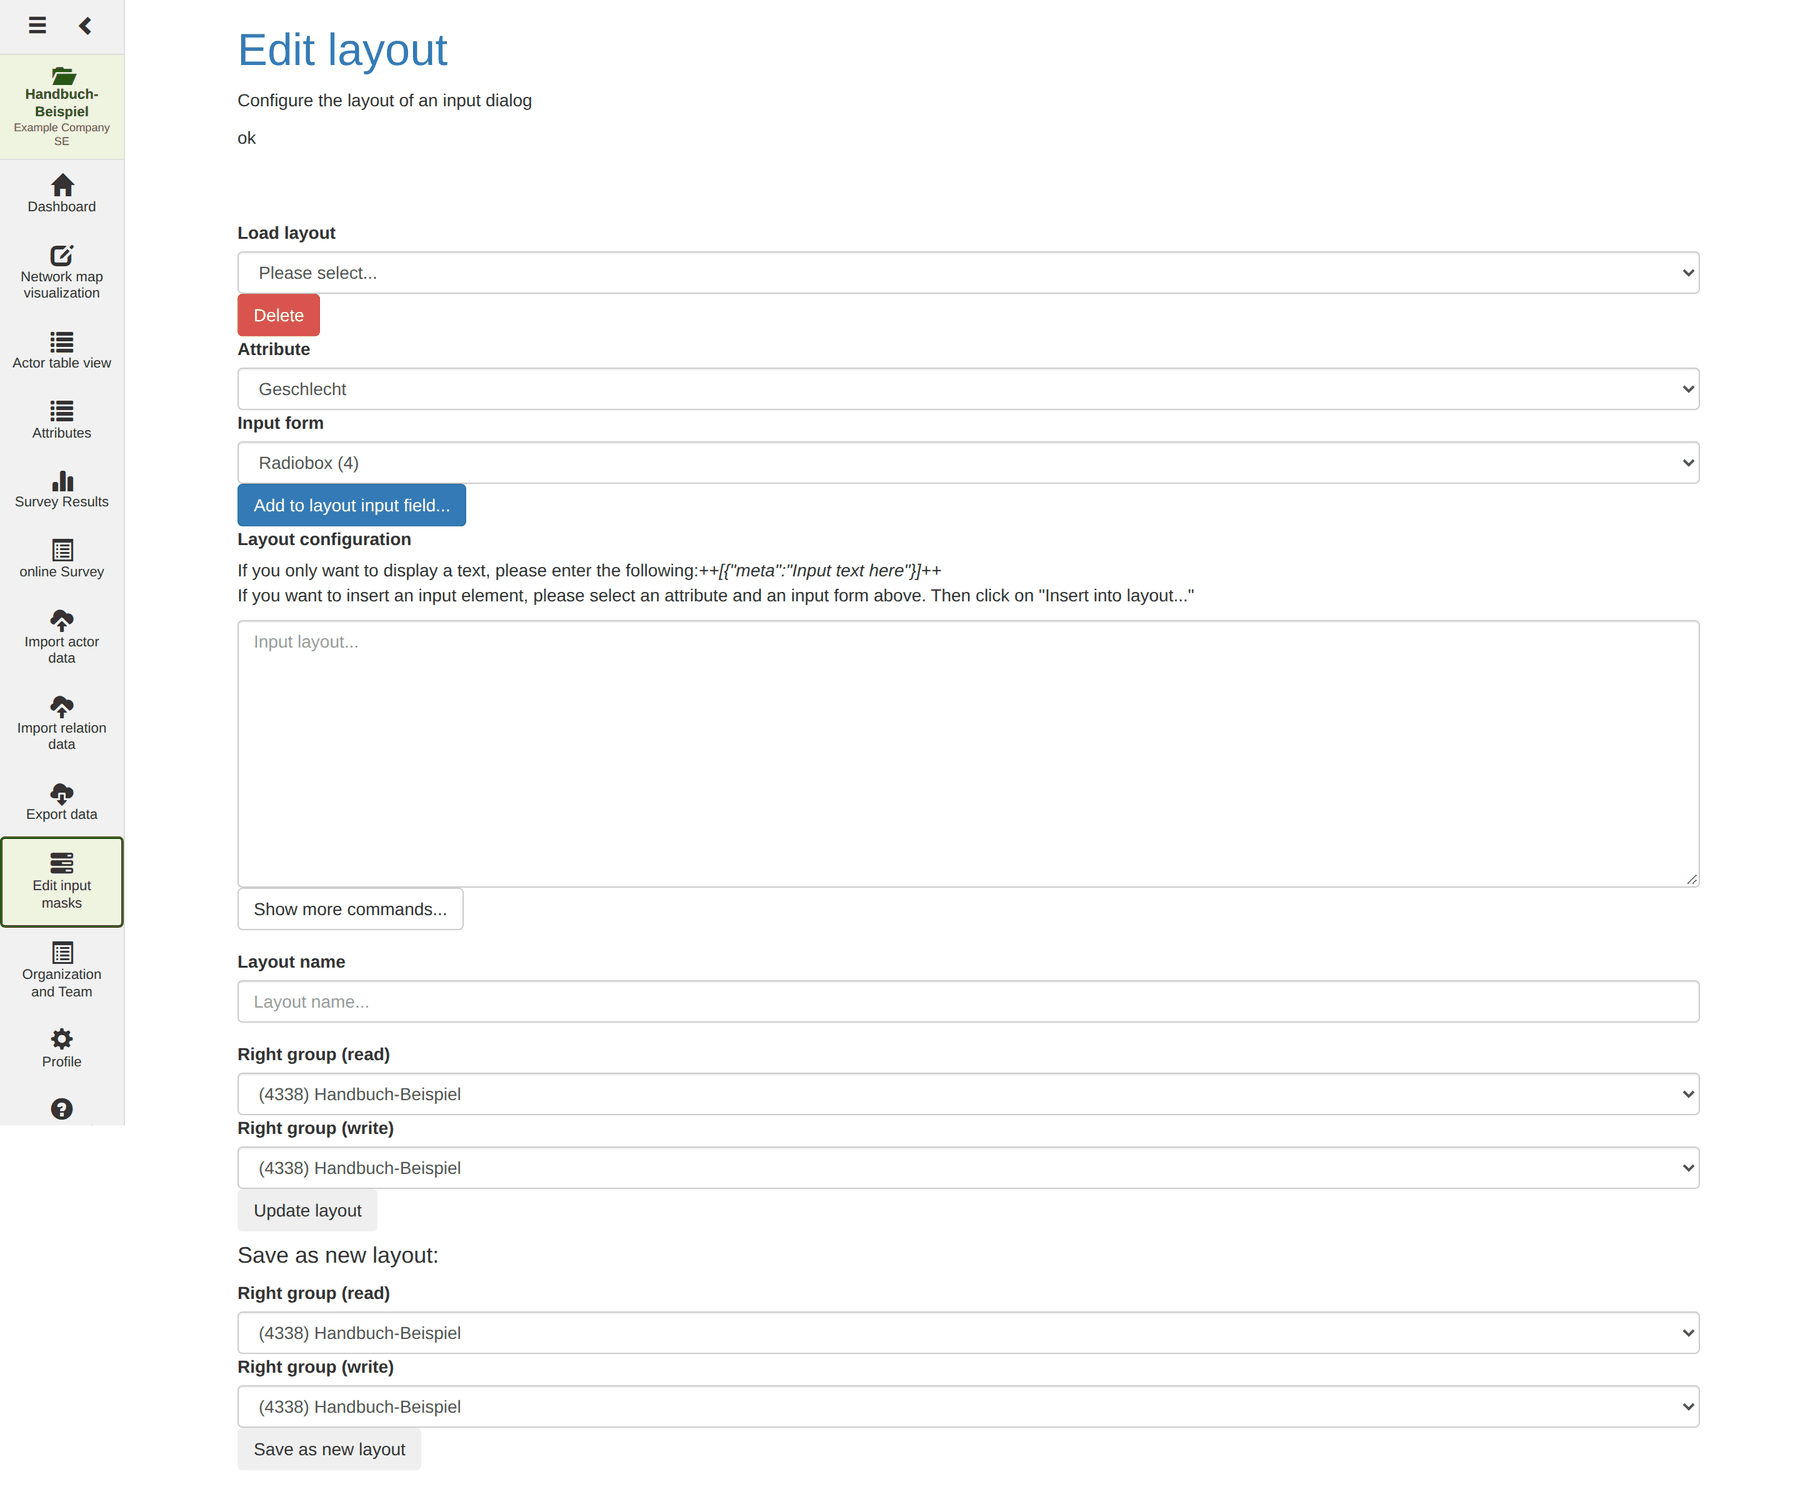
When you create or edit an actor on the network map, a dialog opens. Which fields that dialog contains, and in which order, is set in the module Define input masks – labelled Edit layout templates in the interface.
Without a mask of your own, MyNetworkmap shows a default dialog with every attribute. That is fine for twelve actors and five attributes. As soon as a project has thirty attributes – and after a few centrality computations it does – the default dialog becomes unusable. Then a mask that shows exactly the fields actually needed pays off.
Note: input masks belong to the active project. Creating and changing them needs at least the role Editor.
What masks are used for
A finished mask is assigned on the network map in the Network map section – separately for two situations:
| Setting | When the dialog appears |
|---|---|
| Create actor: input mask | When drawing a new actor on the map |
| Edit actor: input mask | When opening an existing actor |
The two can be filled differently: creating often needs only name and gender, while editing may want to show everything.
How the module is laid out
The page consists of four areas, top to bottom:
- Load existing template – pick a stored mask for editing; Delete removes it.
- Attributes and Input form – the kit from which you generate fields.
- Layout input – the text field in which the mask actually lives.
- Layout name, rights groups and the save buttons.
Inserting a field
- Choose the attribute under Attributes – the list holds every actor attribute of the project.
- Set how the field should look under Input form. Which forms are offered depends on the attribute: attributes with predefined values offer selection forms such as radiobox or dropdown, free-text attributes offer single- or multi-line inputs.
- Click Insert into layout….
MyNetworkmap then writes a text snippet to the end of the Layout input field. These snippets are the mask – you can reorder them there, delete them and mix them with text of your own.
Inserting plain text
For headings and explanations there is a snippet of its own. Type it by hand:
++[{"meta":"Enter the text here"}]++
This lets you break longer masks into sections – “Basic data” before name and gender, “Contact” before the address fields.
Further commands
The button More commands… opens an overview of the remaining snippets. They too belong in the Layout input field.
Tip: work purely additively the first time: choose attribute, choose form, insert – and only then sort things in the text field. That way you obtain the exact spelling of the snippets without having to know it by heart.
Saving
For a new mask:
- Enter a name under Layout name.
- Under Save as new layout choose the read and write rights group – the active project's group is preselected.
- Click Save as new layout now.
For an existing mask: select it at the top under Load existing template, change it and save with Update layout.
Caution: the two buttons are easy to confuse. Update layout overwrites the loaded template, Save as new layout now creates a second one. If you want to try out a variant, take the second.
Rights groups
The two selects determine who may see the mask and who may change it. The default – the active project's group – is right in most cases: the mask then belongs to the project and is available to all its members.
When a mask is worth it
| Situation | Recommendation |
|---|---|
| Few attributes, one editor | The default dialog is enough |
| Several people entering data | A mask – it standardises entry |
| Many attributes, few needed when creating | A mask for Create actor only |
| After centrality computations | A mask – otherwise the dialog holds dozens of nwk_… fields |
Note: the mask only controls the dialog on the network map. The actor table has its own column configuration independently of it, and the online questionnaire brings its own forms.